2014 NCL Pre-Season Write-Up
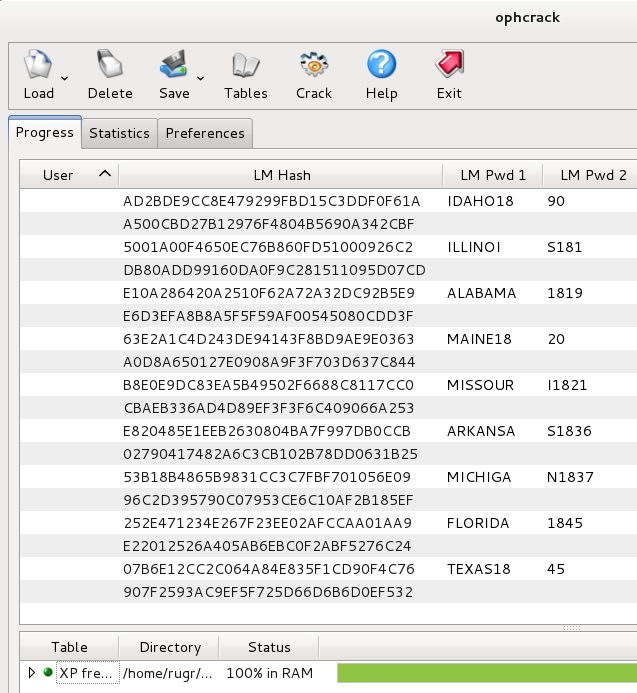
Password Cracking for Windows Passwords
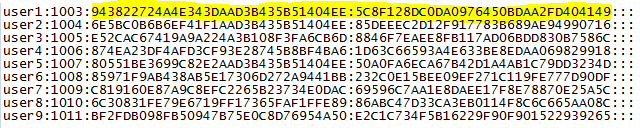
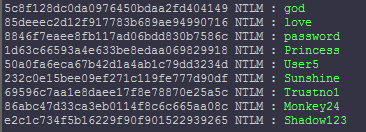
Part one of the section asked what the password hashes were for specific users. To answer those, you simply had to copy the correct hash format and paste it into the flag entry dialog box.
Part two of the section asked what the plaintext passwords were for specific users. In order to get the passwords, you had to decrypt the NTLM hashes. I found that the quickest way to decrypt the NTLM hashes was to use the online tool provided by http://www.hashkiller.co.uk/ntlm-decrypter.aspx.
Password Cracking for Linux Passwords
Part one of the section asked what the password hashes were for specific users. I used the same method as with the Windows passwords, copy and pasting the hash into the flag entry dialog box.
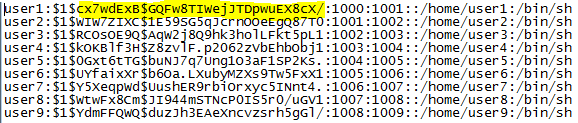
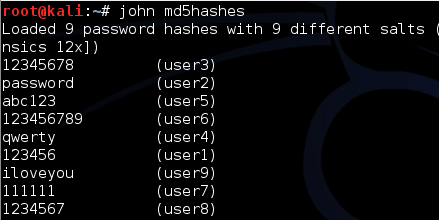
Part two of the section asked what the plaintext passwords were for specific users. In order to get the passwords, you had to decrypt the MD5 hashes. I found that the quickest way to decrypt the MD5 hashes was to use John the Ripper.
Part three of the section asked what the password hashes were for each specific user and this time the encryption method used was SHA-256. In order to determine the hash algorithm, you must look into how Linux stores passwords. $5$ indicates that the SHA-256 algorithm was used to hash the passwords. Knowing which hash algorithm was used may be required depending on which tool you are going to use to crack them.
Below is a guide for future reference.
$1$= MD5
$2$=Blowfish
$2a=eksblowfish
$5$=SHA-256
$6$=SHA-512

The flags for this section were captured by copying and pasting the hashes into the flag submission dialog box.

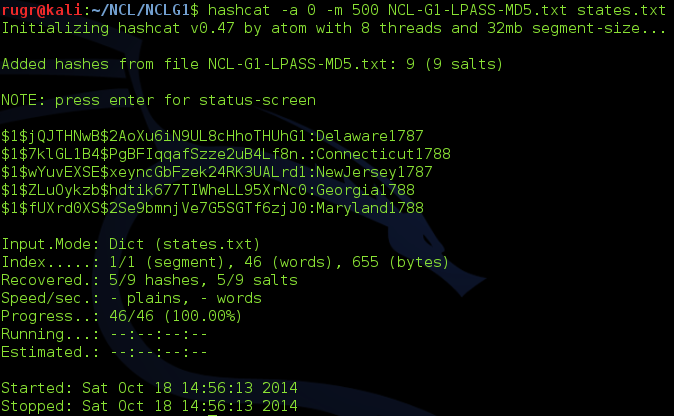
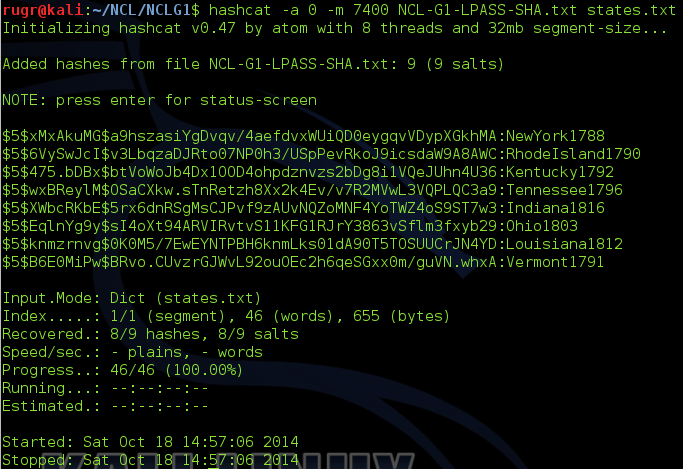
Part four of the section asked what the plaintext passwords were for specific users. In order to get the passwords, you had to decrypt the SHA-256 salted hashes. Again, I used John the Ripper. Note in the screenshot below that John the Ripper was able to detect the SHA-256 hash algorithm.

John the Ripper was unable to decrypt user5 and after several additional tries, I moved on.
Network Traffic Analysis
I used Wireshark to analyze the four PCAP files provided for this portion of the challenge. If you have used Wireshark before, the majority of the questions are fairly straight forward. When I first began using Wireshark, I found the best way to learn was by capturing my own network traffic and analyzing it.
Network Capture 1 – Questions and Answers
![]()
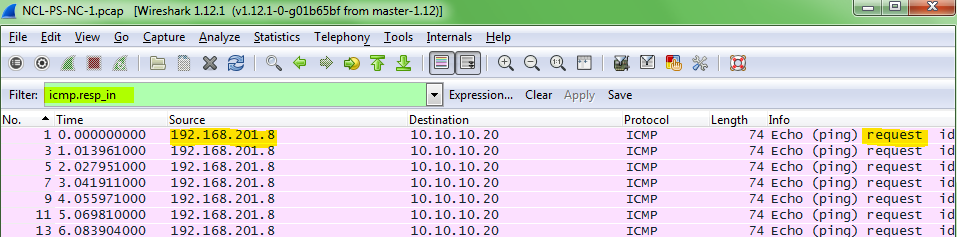
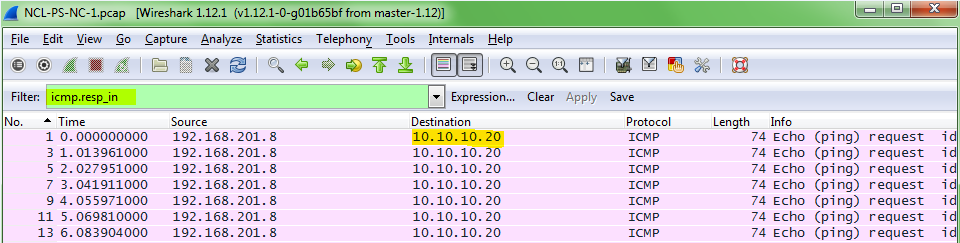
In order to determine which IP address was sending ICMP requests, I applied a filter (icmp.resp_in) that would show me all ICMP requests. From there it was a matter of singling out the source IP (192.168.201.8) and pasting it into the flag dialog box.
![]()
To find the IP address of the system replying to the ICMP requests you can look at the destination of the ICMP request (10.10.10.20).
![]()
Using the same filter (icmp.resp_in) that was used to see all of the ICMP requests, you can look at the bottom of the window pane to see how many requests are being displayed by the filter, in this case there were 19 ICMP requests being displayed.

![]()
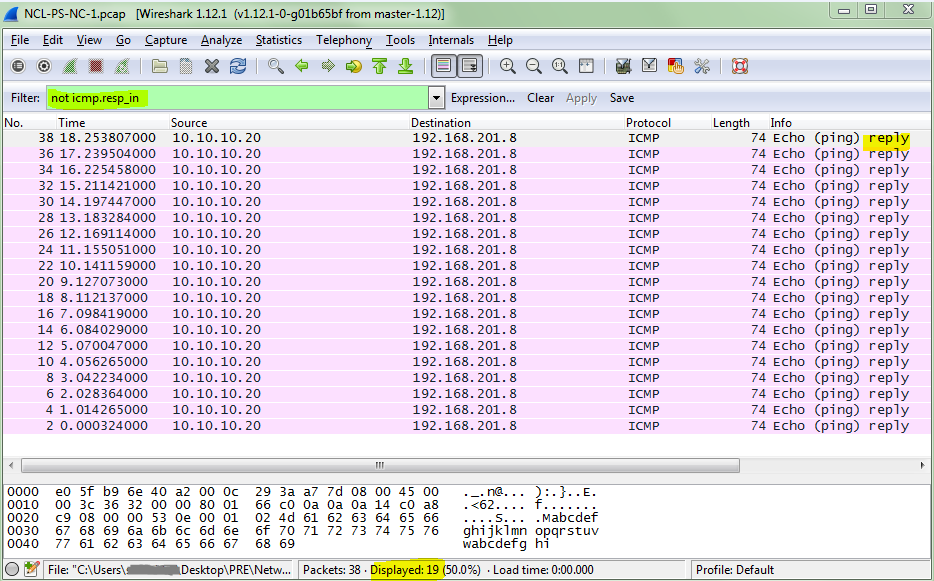
To see how many ICMP responses were in the capture, you can add “not” to the beginning of the previously used filter (not icmp.resp_in). Again, looking to the bottom of the window pane, you can see that there were 19 ICMP responses.
Network Capture 2 – Questions and Answers
![]()
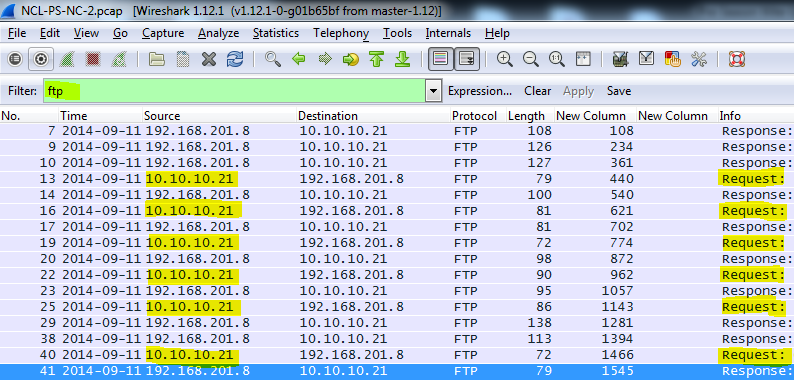
In order to find the IP address of the FTP user, I applied the “ftp” filter to eliminate all non-FTP traffic. Once the filter was applied, it was a matter of identifying the source IP address (10.10.10.20) of the FTP request.
![]()
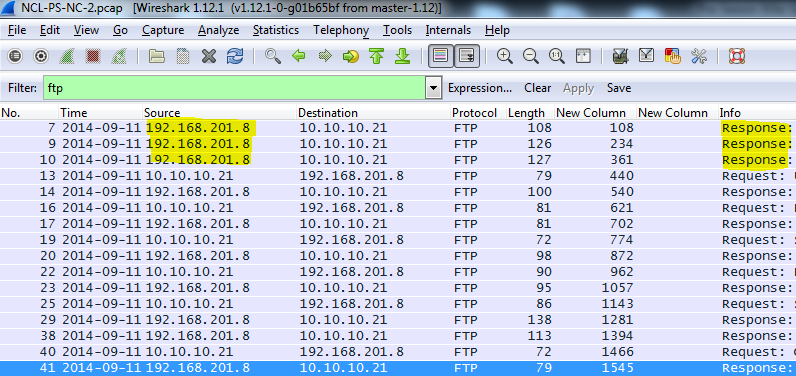
To find the IP address of the FTP server, you need to identify the source IP address (192.168.201.8) of the FTP response.
![]()
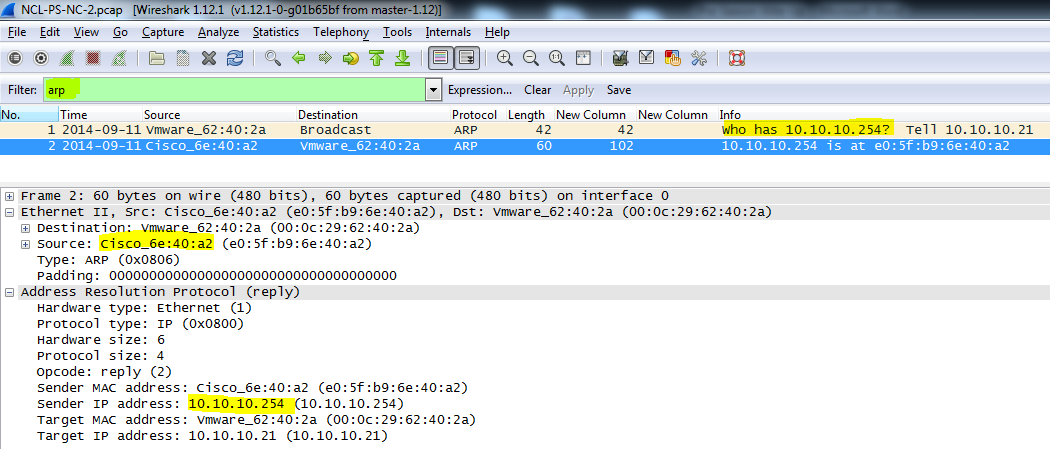
To find the Default Gateway to the FTP user, you can use the “ARP” filter. This may not always be the easiest way; however, because there was only one broadcast and one reply in the capture, it turned out to be straight forward.
![]()
![]()
Finding the username and password can be completed by looking at the information in the Info column.
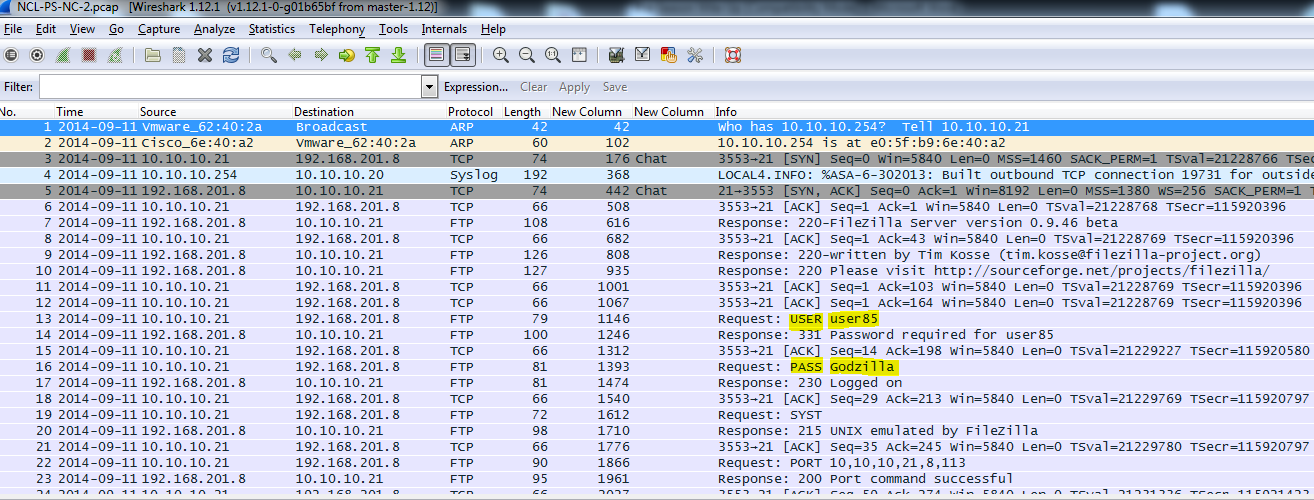
Additionally, the entire conversation can be viewed by right clicking on one the ACKs and following the TCP stream.
![]()
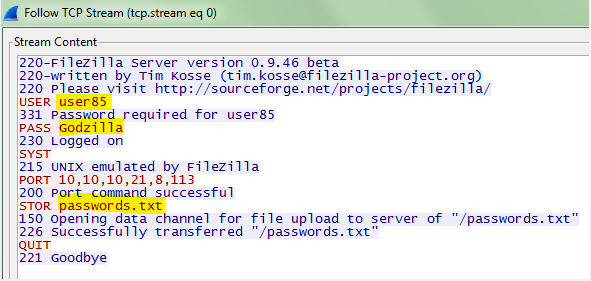
You can see using the screenshot above that the name of the uploaded file was passwords.txt
![]()
To view the contents of the uploaded file you need to find the packets that contain FTP-DATA in the Protocol column, right click on one of them and Follow the TCP Stream.

A dialog box will open containing the contents of the file. You should use the “Save as” option to export the data out and use a MD5 generator such as “Hash my Files” to get the needed MD5.
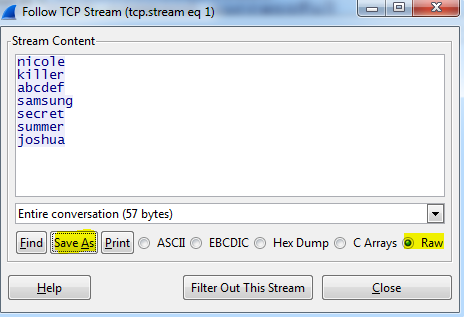
The MD5 for the exported text was: B0B625BD4997A9C43258FC9C320FD24D
Network Capture 3 – Questions and Answers
The questions in this section were self-explanatory; however, I listed screen shots of the answers for those that may have not seen questions like them before.
![]()


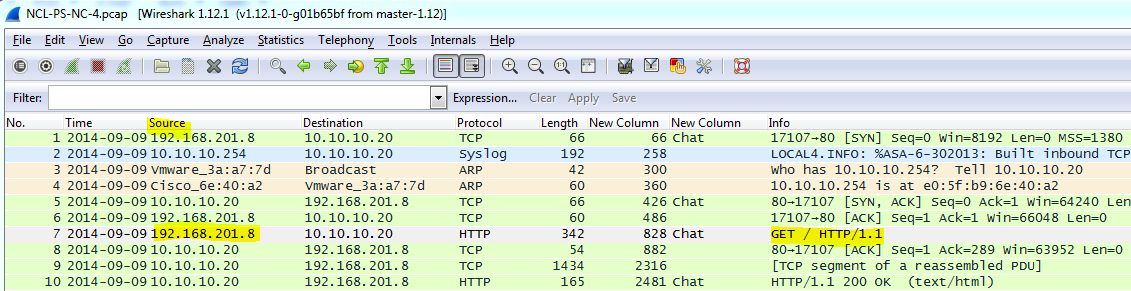
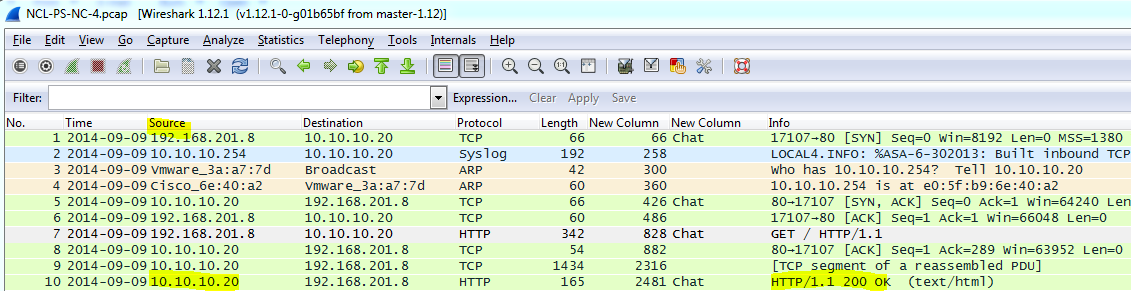
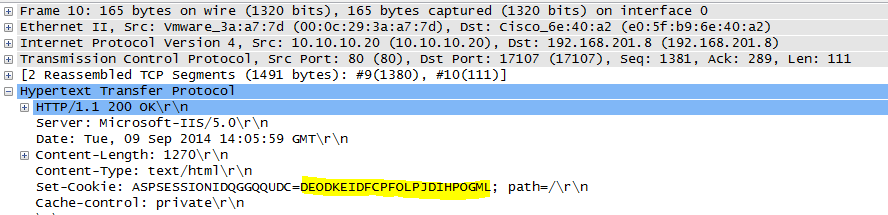
Network Capture 4 – Questions and Answers

Scanning and Reconnaissance
Recon 1 – Questions and Answers
For this section you were provided with an IP address and asked to determine which TCP and UDP ports were open. The questions were phrased as follows:
![]()
The TCP portion had several questions like the one above and could be answered by using a scanning tool, such as NMAP. I used Zenmap, which is a GUI version of NMAP on this portion of the challenge.
Using Zenmap, I ran an Intense scan, all TCP port which generates the following Nmap Command:
nmap -p 1-65535 -T4 -A -v 54.83.4.56
All the questions could be answered by looking at the port numbers in numerical order.
The UDP portion contained the same questions, but instead asked for the UDP port numbers.
Using Zenmap, I ran an Instense can plus UDP which generates the following Nmap command:
nmap -sS -sU -T4 -A -v 54.83.4.56
Recon 2 – Questions and Answers
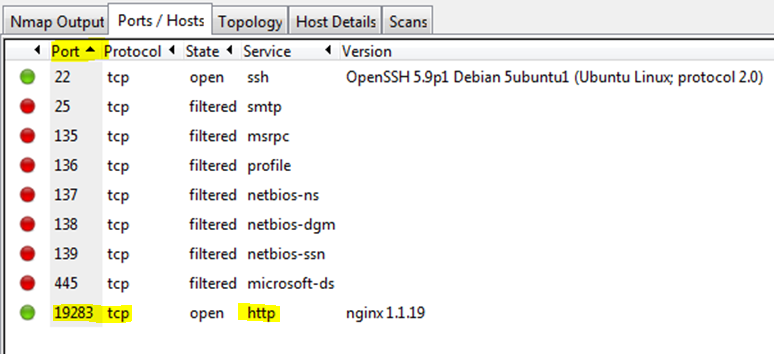
For this section, an IP address was provided and scanned using Zenmap.
![]()
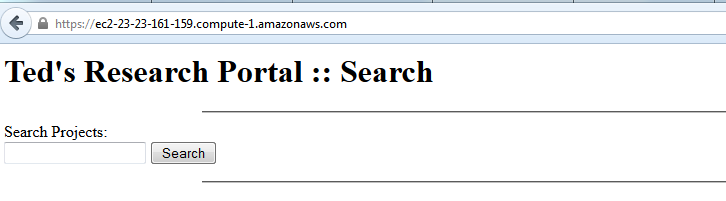
The Zenmap scan revealed one open http port (19283).
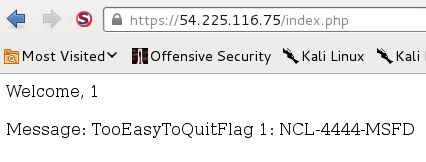
Entering the IP address and specifying the port number revealed the first flag.

![]()
Viewing the source of the webpage revealed Flag 2, 3, 4 and an encoded value for Flag 5.
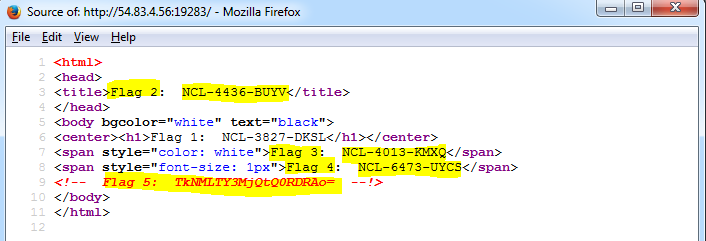
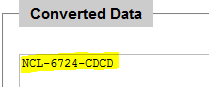
To determine what Flag 5 was, the encoded texted was plugged into an online base64 decoder. Flag 5 was revealed.
Open Source Intelligence
For this section it is important to remember what the topic is.
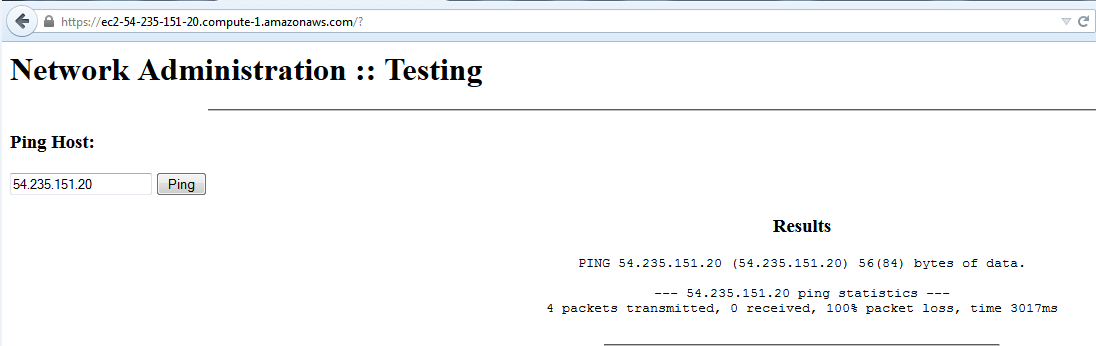
The target IP address provided leads to a webpage containing a cross-site scripting vulnerability.
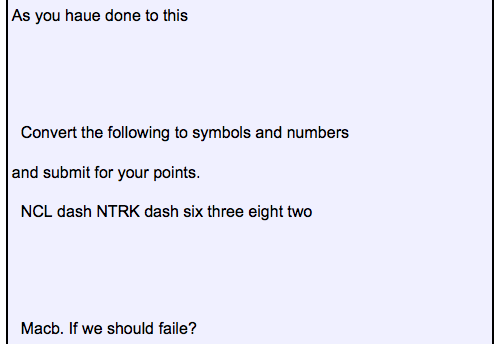
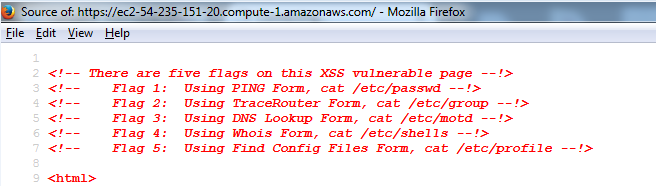
If you view the Page Source you will find the following hints:
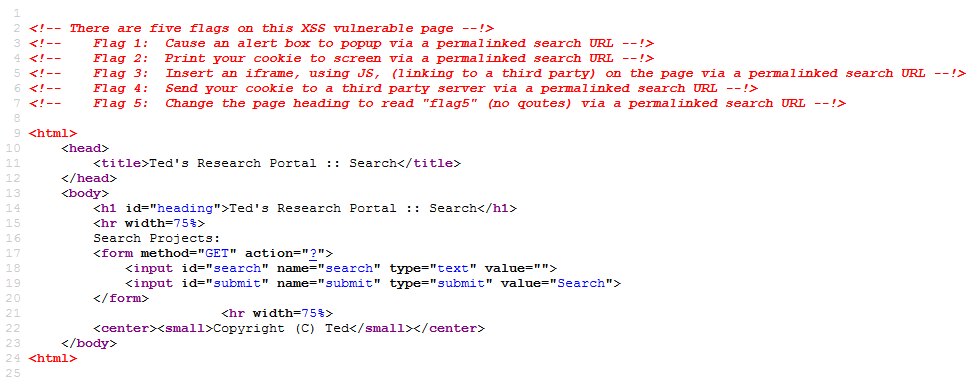
Googling one of the flag hints will lead you to the document containing the answers.
“Flag 1: Cause an alert box to popup via a permalinked search URL –!>”
I must admit that this section only came easy because the exact same challenge, containing the same flags were explained in the publicly released NCL 2012 Challenge Explanations, which I had read prior to the start of the pre-season.
The second portion involved the same steps as above with a new target IP
Web Application Exploitation
Web 1
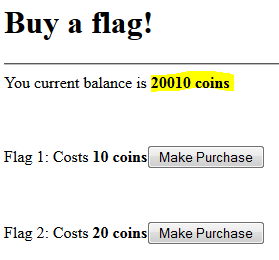
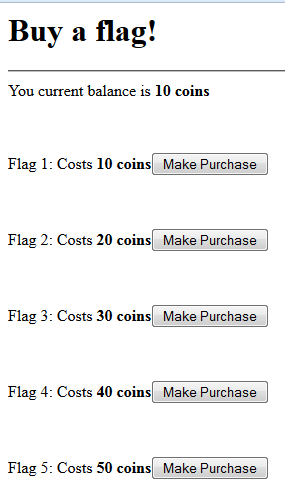
For this challenge, you were given an IP address, which led you to the following page:

As you can see there is a cost involved in order to reveal the flag and you do not have enough coins to get them all.
To reveal the flags for this section, I used the Inspect Element feature on the page and deleted the node highlighted in yellow below, for each flag. Instead of deleting the entire node, the value could also be changed.

Web 2
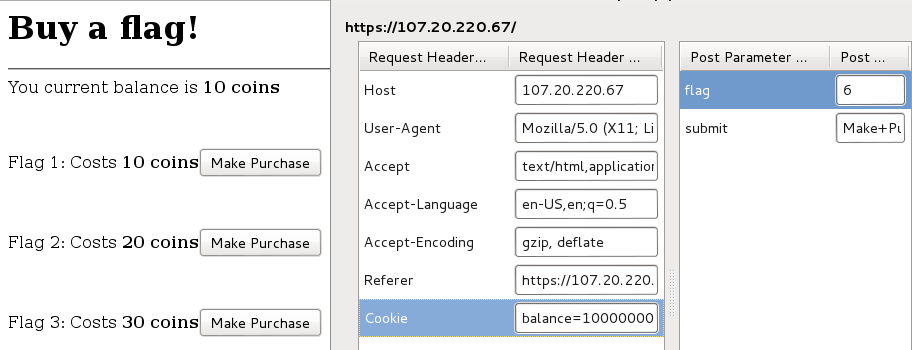
This section contains the same concept as the previous section.
Deleting “Hidden” from the ‘type’ field modified the page so that a form became available.

Entering a negative value in the form field resulted in adding coins to the balance.
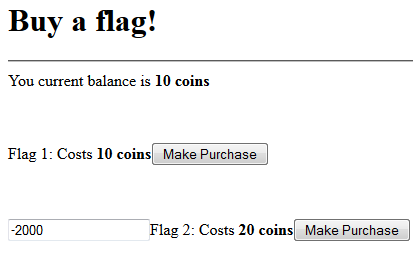
Adding -2000 into the form resulted in adding ten times that amount into the coin balance.